Sunday, January 30, 2011

A Baby Book of Sorts

Nicole from Making It Lovely (a local Chicago blogger who has great style) has been chronicling the life of her first child for 4-6 weeks before her second child is born. I love the concept of attaching brief phrases with iconic pictures of her daughter's daily habits, and thought it might help me capture my own memories of Eden.

Here is where I admit the AWFUL truth that I have not really kept a baby book for Eden. I'm not a journaler in the traditional sense. I like taking pictures that help me visually remember what our life has been like- I'm a sucker for nostalgia. I'm not nearly as interested in when Eden first laughed, smiled or rolled over as I am in remembering the face she would make just before nursing or the funny way she said meeetins instead of mittens. I know I know, when/if she has kids of her own she'll probably ask about all the milestones and doctors notes and she can be mad at me then, but I will have thousands of pictures for her to compare to her future children.

If I keep up with this little project, it may become a blurb book, but in the meantime you can expect more cute little nibbles of Eden's daily quirks and routines. 


Friday, January 28, 2011

My first tutorial!


I'm not sure that anyone who reads this blog actually sews, but I was bored during Eden's 3 hour nap and out of wrapping paper for a very belated little girl's birthday present.

Felt is such a wonderful medium. This particular type is Eco-fiber, made from recycled plastics I believe, and is very inexpensive. It can be found at Jo-Anns. Felt doesn't fray and it stays sturdy while sewing, so it's a great for beginners*ahem*.

This whole project can be done by hand sewing, no machine required! You can easily change the dimensions to fit whatever your gift may be. The flap can be cut differently and the embellishment possibilities are endless.


Here's the tutorial:

Materials:
Felt (I used two colors)
Contrasting Thread (or embroidery thread if you are hand sewing)
Coordinating Fabric Scraps
Velcro (optional, and not used in the pictured envelope)
Fabric marking pencil (you can also use chalk or just wing it :) )


1. Cut two rectangles.
First rectangle: Determine the size bag you will need by measuring your finished present and adding 1 inch to each side for seem allowances and room. This will be the dimensions for the front of your envelope. Cut one rectangle to this size.
Example: My finished present folded measured 8.5 X 8.5. I cut my first rectangle 9.5 X 9.5.

Second rectangle: Keep the same width as your first rectangle and add 5 inches to the height (the extra is your flap).
Example: My first rectangle was 9.5 X 9.5 so my second rectangle was cut 9.5 X 14.5.
***If I were to do this project again, I would add more inches to the height of my larger rectangle, to make the flap longer- adjust to your liking.***


2. Using a plate and your preferred method of fabric marking (I like chalk pencils), round off the top two corners of your larger rectangle. This will be the flap. You may choose to cut it in a different manner, mark accordingly.


3. Cut the edge with pinking shears or make a decorative edge with normal fabric scissors. You really can't go wrong, just use your imagination!


4. Align the smaller rectangle on top of the larger, wrong sides together, with the straight edges aligned and the flap extending at the top. 


5. Using a contrasting thread color, sew around three sides, stopping and starting at the top corners of the smaller rectangle, leaving an opening along the top edge and leaving the flap unsewn. If machine sewing, backstitch a little at the beginning and end to secure and use a 1/4" seam allowance. If sewing by hand, use embroidery thread to sew a running stitch, whip stitch, or blanket stitch around these three sides. (google the stitches, you will find thousands of easy tutorials).


6. Fold over your flap and finger crease.

***At this point you can add velcro to the inside of the flap and the front of the small rectangle, being careful that they would line up when closed. I was out, and as I mentioned this was a naptime project. The decorative embellishments will hide the stitching from adding velcro. Simply pin your velcro pieces and sew around all four corners, close to the edge.****


7. Cut various sized circles from coordinating fabric and felt using pinking shears. I was in a hurry so I eyeballed the circles, but you can mark them first with a fabric pen/pencil. You could also cut five petaled flowers, bows, hearts, etc.etc. Again, get creative!


8. Layer and tack your flowers together. I used a sewing machine with a darning foot attachment and free motion quilted my layers with a circular stitch pattern. You can simply use a straight line sewn back and forth or a decorative stitch if your machine allows. If hand sewing, create your own pattern with embroidery thread.


9. I added a decorative edge to my envelope using my darning foot and some free motion stitching. If your machine has decorative stitches you can use those, or hand embroider a design (even a simple running stitch in a contrasting color would look cute).


10. I tacked the flowers into place on the center front of the envelope flap, though you may place them wherever strikes your fancy. Stitching forward and back a few times is all you need, just so they are securely in place. Make sure to do this with the flap open so you don't sew your envelope shut.


Tada! Your done!

It's a bit silly that I'm making more out of the "wrapping paper" than I am out of the present. The gift is for Eden's only girl-friend in our neighborhood (seriously, drowning in boys over here). She occasionally hosts a tea party, and even though she is a whole year older, is quite the hostess to Eden. We wanted to surprise her with a tablecloth for her birthday, but by the time I had the measurements it was almost Christmas, which meant a month away from my sewing machine. So it's late, but I think she like it just the same! Randomly timed gifts are in fact my favorites.

(this is shown on Eden's table, her friends is a bit larger)
Wednesday, January 26, 2011

A Day

Over the holidays my sister gave me a quick tutorial on editing photos. I'll never be a great photographer, but I used to think I would never get anything more than a blurry picture! Some artist, huh? Thanks to her hand me down camera and photoshop tips, I now really enjoy documenting our lives. And you thought this blog was picture heavy before!!

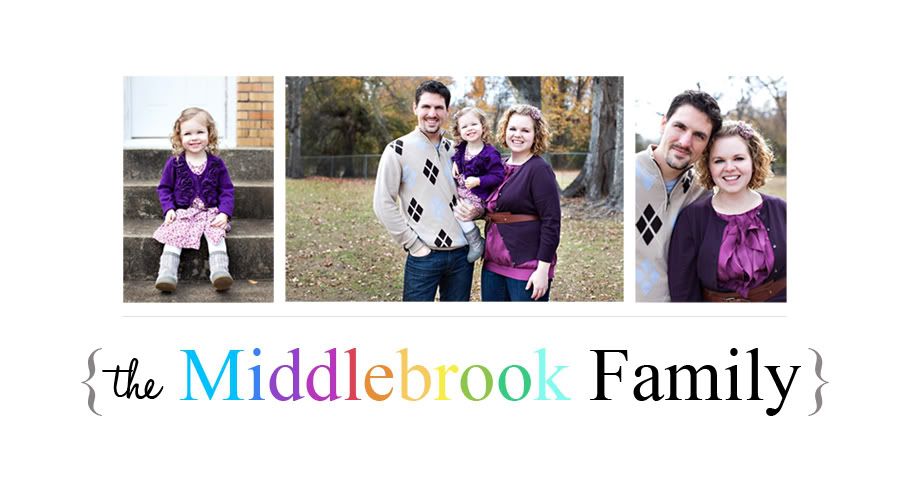
Speaking of my sister the great photographer, did you notice the new blog layout? It's a lot cleaner and more my style. The fantastic family photos in the header are courtesy of Jill who always treats us to a photo shoot when we're together at Christmas. We're so spoiled! You can check out her other great work on her website.

Here is our day (well, yesterday) in photos.

Music in the morning.


Then working on our letters.


A quick errand to Target for milk landed me a fun new project (more to come later).


Playing with big and little princesses,


And our music box.


Making Trader Joe's Instant Pudding after lunch.


Working on our alphabet after lunch.


Making Chocolate Chip Bread Pudding with Cinnamon Rum Sauce during Eden's nap. We were given some stale Italian bread for free, perfect timing for a dessert to take to our house group.


Sick kiddo. Eden and I missed house group because she woke up from her nap feverish and coughing.


Big girl hairdos. Eden's hair is now long enough to put into a french twist. Too cute!! Especially when she's soaking in a bubble bath. Quite the classy girl. It definitely helped her feel better.


Eden is feeling a bit better today, although her toddler emotions are on a bit of a huge roller coaster. I'm looking forward to spending some time with Thomas tonight. The beginnings of our week are very busy in the evenings. Wednesday is always such a nice lull. Happy evening to you all!

Tuesday, January 25, 2011

More Christmas Crafting

These are the last two Christmas projects I have to share. We draw names in Thomas' family amongst the siblings. This year I drew my sister-in-law Emily. She is a sorority member in Delta Gamma, and their symbol is an anchor (for hope). So she collects anchors. As much as I would have loved to give her this (she is quite a classy gal) it wasn't quite in the budget. Luckily, blank stationary is also always in style.

Sewing onto cards has been on my to do list for a while and it turned out really well! This is just what it sounds like, sewing onto a blank card with your sewing machine. It's simple and easy (as long as you don't sew the card shut, ahem).


Some of the fabrics were even left over from her high school graduation quilt. Luckily the sorority colors are pink and blue, which happen to be just her style. It can be difficult to find a handmade gift for someone who's style is on the other end of the spectrum from handmade chic, but these are so adaptable I think they would fit anyone.


My last gift took the most time, hands down. I literally sewed all the way to Texas and then 3 hours after we got there, and I was over halfway done before the trip began! Last Christmas my parents gave me Alabama Stitch Book by Natalie Chanin. There are so many inspiring projects, and this one was perfect for my mom. 

This shawl is made from deconstructed t-shirts, but still has such a luxury about it.  


The applique is attached using upholstery thread, which gives the knit material some much needed stability, but it knots up terribly. Did I mention this took forever?


I think it's a wonderful weight for a Texas shawl, and it will go with everything from blue jeans to a dress.


Anyone make a handmade Christmas gift?

Tuesday, January 18, 2011

Handmade Christmas

Whew! The holidays are always such a fun whirlwind. Texas was a blast. Seeing our family for a long period of time made me feel more like myself, and a few services at our home church certainly helped as well. Eden has been asking to go back. A typical conversation while I'm clicking her into her car seat goes like this:

E: Daddy go work. Eden go Texas!
K: No sweetie, Texas is too far away, we're going _____.
E: No, Texas! Kilsy, Ryan, Gdaddy, (etc) Go Texas!
K: Texas is really far away. Remember? We had to drive all day.
E: Ok- go park!

Thankfully her bath time with her cousin Kilsyth has cured her of her fear of toys in the water. We were all definitely spoiled with food and books and toys and time.

I LOVE giving presents and am having a ton of fun with nieces, a nephew, and a daughter to spoil. Here's the roll of the handmade goodies I put together for the little cuties in my life.


For: Eden, Sophie, & Kilsyth
Princess and the Pea Doll Sets
Doll adapted from Wee Wonderfuls


Variations of Princess and the Pea doll sets have been circulating crafting blogs for several months. After much search I became frustrated trying to find a pattern for a doll smaller than 10 inches. Finally I discovered that Wee Wonderfuls contains a pattern for a small mermaid doll. This of course not only solved my problem but also gave me the much needed reason to splurge on the book. I adapted the pattern by adding legs, changing the bottom of the fin to look more like a dress, leaving it unstitched on the bottom, adding crowns, and embroidering sleepy eyes.


I had lots of fun sorting through all of my scrap fabric for mattresses (31 total!!). A small felt pea was attached to the end of decorative ribbon which was sewn into the edge of one mattress in each set. I cut up an embroidered tablecloth that I'd snagged from an estate sale, and made little blankets edged with a decorative stitch.


They each got wrapped up in Peek-A-Boo Toy Sack from Make It Perfect.


For: Kieran
Bend the Rules Sewing's Puppet Theater & Puppets


I'm afraid my nephew is getting to the age soon that handmade presents will no longer be cool. Luckily I found an awesome pattern in Bend the Rules Sewing by Amy Karol that was perfect for a 4 year old boy. IKEA has awesome home decor weight fabrics which were perfect for this project. I added a removable sign using chalkboard oilcloth and whipped up some outer space themed hand puppets.  Hopefully I can send him a few more puppet sets throughout the year. Felt is easy to work with and is quickly becoming a favorite medium.

For: Ransom
Wee Wonderfuls Koji Doll


I've really enjoyed Wee Wonderfuls by Hillary Lang. There is a wonderful range of dolls for boys and girls of all ages with easy to follow instructions. Hillary's blog is also a good read! She has a ton of darling embroidery patterns. My fantastic sister got me her Kit, Chloe, and Louise pattern for Christmas. Three dolls, three little beloved girls in my life??


Amazingly enough I had time for 2 (though unfortunately not for 3) crafty presents for adults. That's up next!